


Five Easy Steps for Better Grave Stone Photography
And it does not involve an iPhone.

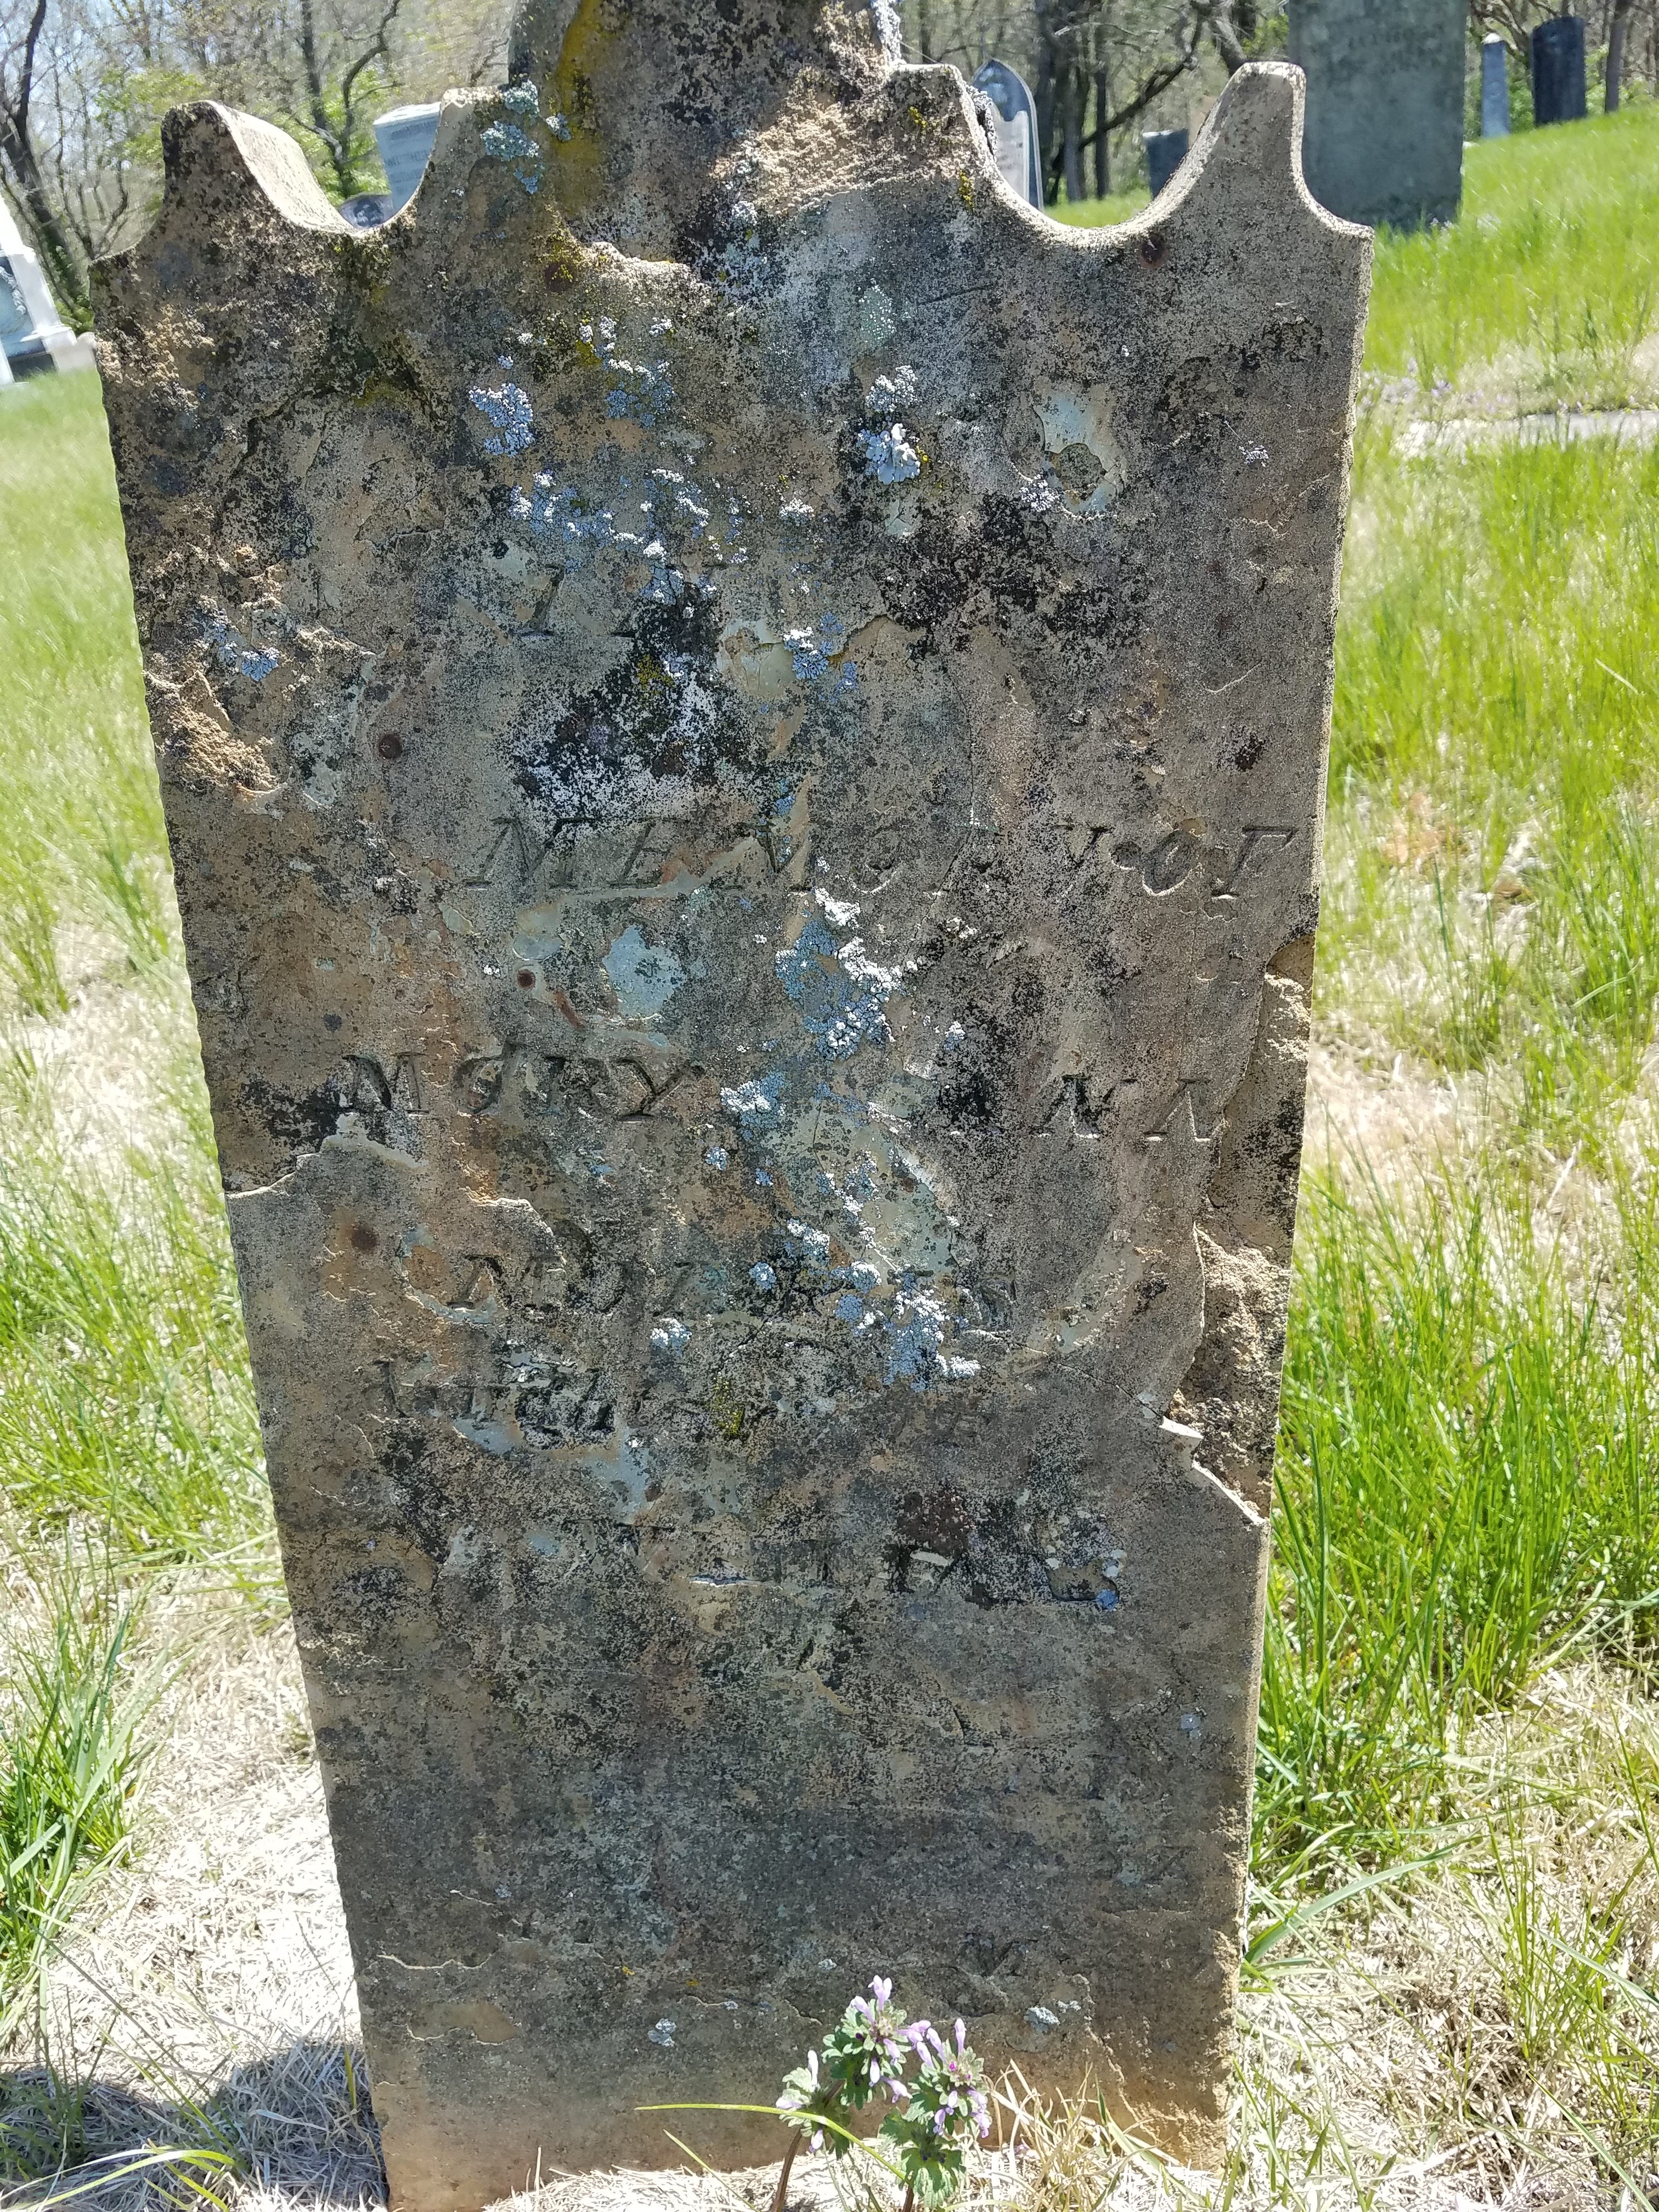
I love to use Find A Grave dot com for research and I use it a lot. But the pictures are often “less than optimal” shall we say. But you don’t have to be a professional photographer with expensive equipment to do better! Follow along for a short tutorial in taking documentation photos.
TLDR:
Take photos on a bright sunny day.
Take photos at the right time of day which is late morning for east facing and early afternoon for west facing.
Use a tripod or steady stick. Can cost as little as $5.
Control parallax. That means a full face on centered shot.
Take 3 shots: , 1) full face on, 2) wide shot for geospatial orientation and a 3) close up for details.
That’s it. Just do those five things and your photos will improve immensely.
Dan and Jesse Lie Farber innovated techniques on Grave Stone photography many decades ago before the advent of digital cameras. Much of their advice still applies today in spite of the outdated film recommendations. It is worthwhile to read their thoughts on this. Click here > Making Photographic Records of Gravestones
Another viewpoint on this topic can be found by Maureen Taylor, writing on Genealogy.com. Click here >Tips for Photographing Gravestones
But now the prevailing attitude seems to embrace the smug confidence of the latest technology. Just whip out the ole cell phone and snap away! Here follows my biased but informed opinion on this topic. I don’t use telephones to take photos. I use a real camera.
BUT WHAT’S WRONG WITH MY SUPER DOOPER TURBO CHARGED iPhone?
Smart phone photos are great for casual snapshots but they are not yet good enough to use for a formal documentation photo (don't shoot me, it's just my opinion). Yes, iPhones do have one of the best cameras in the smart phone world. But the aperture is fixed at 1.7, the sensor is small, and it does not have the same flexibility as a high quality lens. Just Google “advantages of DSLR over an iPhone” to see the details on this. If you insist on using a a smart phone, then follow the other recommendations; put it on a tripod, avoid parallax, etc. In the same vein, using an expensive camera and not knowing how to use it is counterproductive as well.
All of the great repair work we do on grave markers will one day turn to dust. All that may remain is a photo. Here's how to take great documentation photos to preserve an image for posterity:
How to improve your cemetery photography:
EQUIPMENT
Spend your budget on the best lens you can afford, not the camera body. A full frame DSLR or Full Frame mirrorless won't matter too much unless you are doing really serious enlarging. After trying a number of cameras I still like my Canon DSLR cropped frame EOS SL2 1(24 megapixels). Used, it's about $300. The lens is an EF 24-70 mm zoom L series. $900 used is a steal. Using an EF lens on an EFS cropped frame body is a harmless mismatch. But it means effectively I now have a 38-112mm zoom due to the 1.6 conversion factor.2 I like Canon because there is a ton of good used equipment in circulation. Panasonic Lumix and Pentax are other brands to look at. Nikon does not offer an articulating screen except in the high end mirrorless models. Buyer beware and shop carefully for the exact features you need.

The go to lens for cemetery photography. Cannon EF 24-70 1:2.8 L II USM. Photo from Canon USA. If you can not afford a high end zoom lens, a great solution is to use a 50mm prime lens. Same high quality photos as a professional zoom lens, but without the convenience of zoom capability. Price used is around $100.


The lowly Canon SL2 has an articulating screen (folds out and swivels). Priceless feature for getting those low to the ground shots. This is a deal breaker for me. Must have.
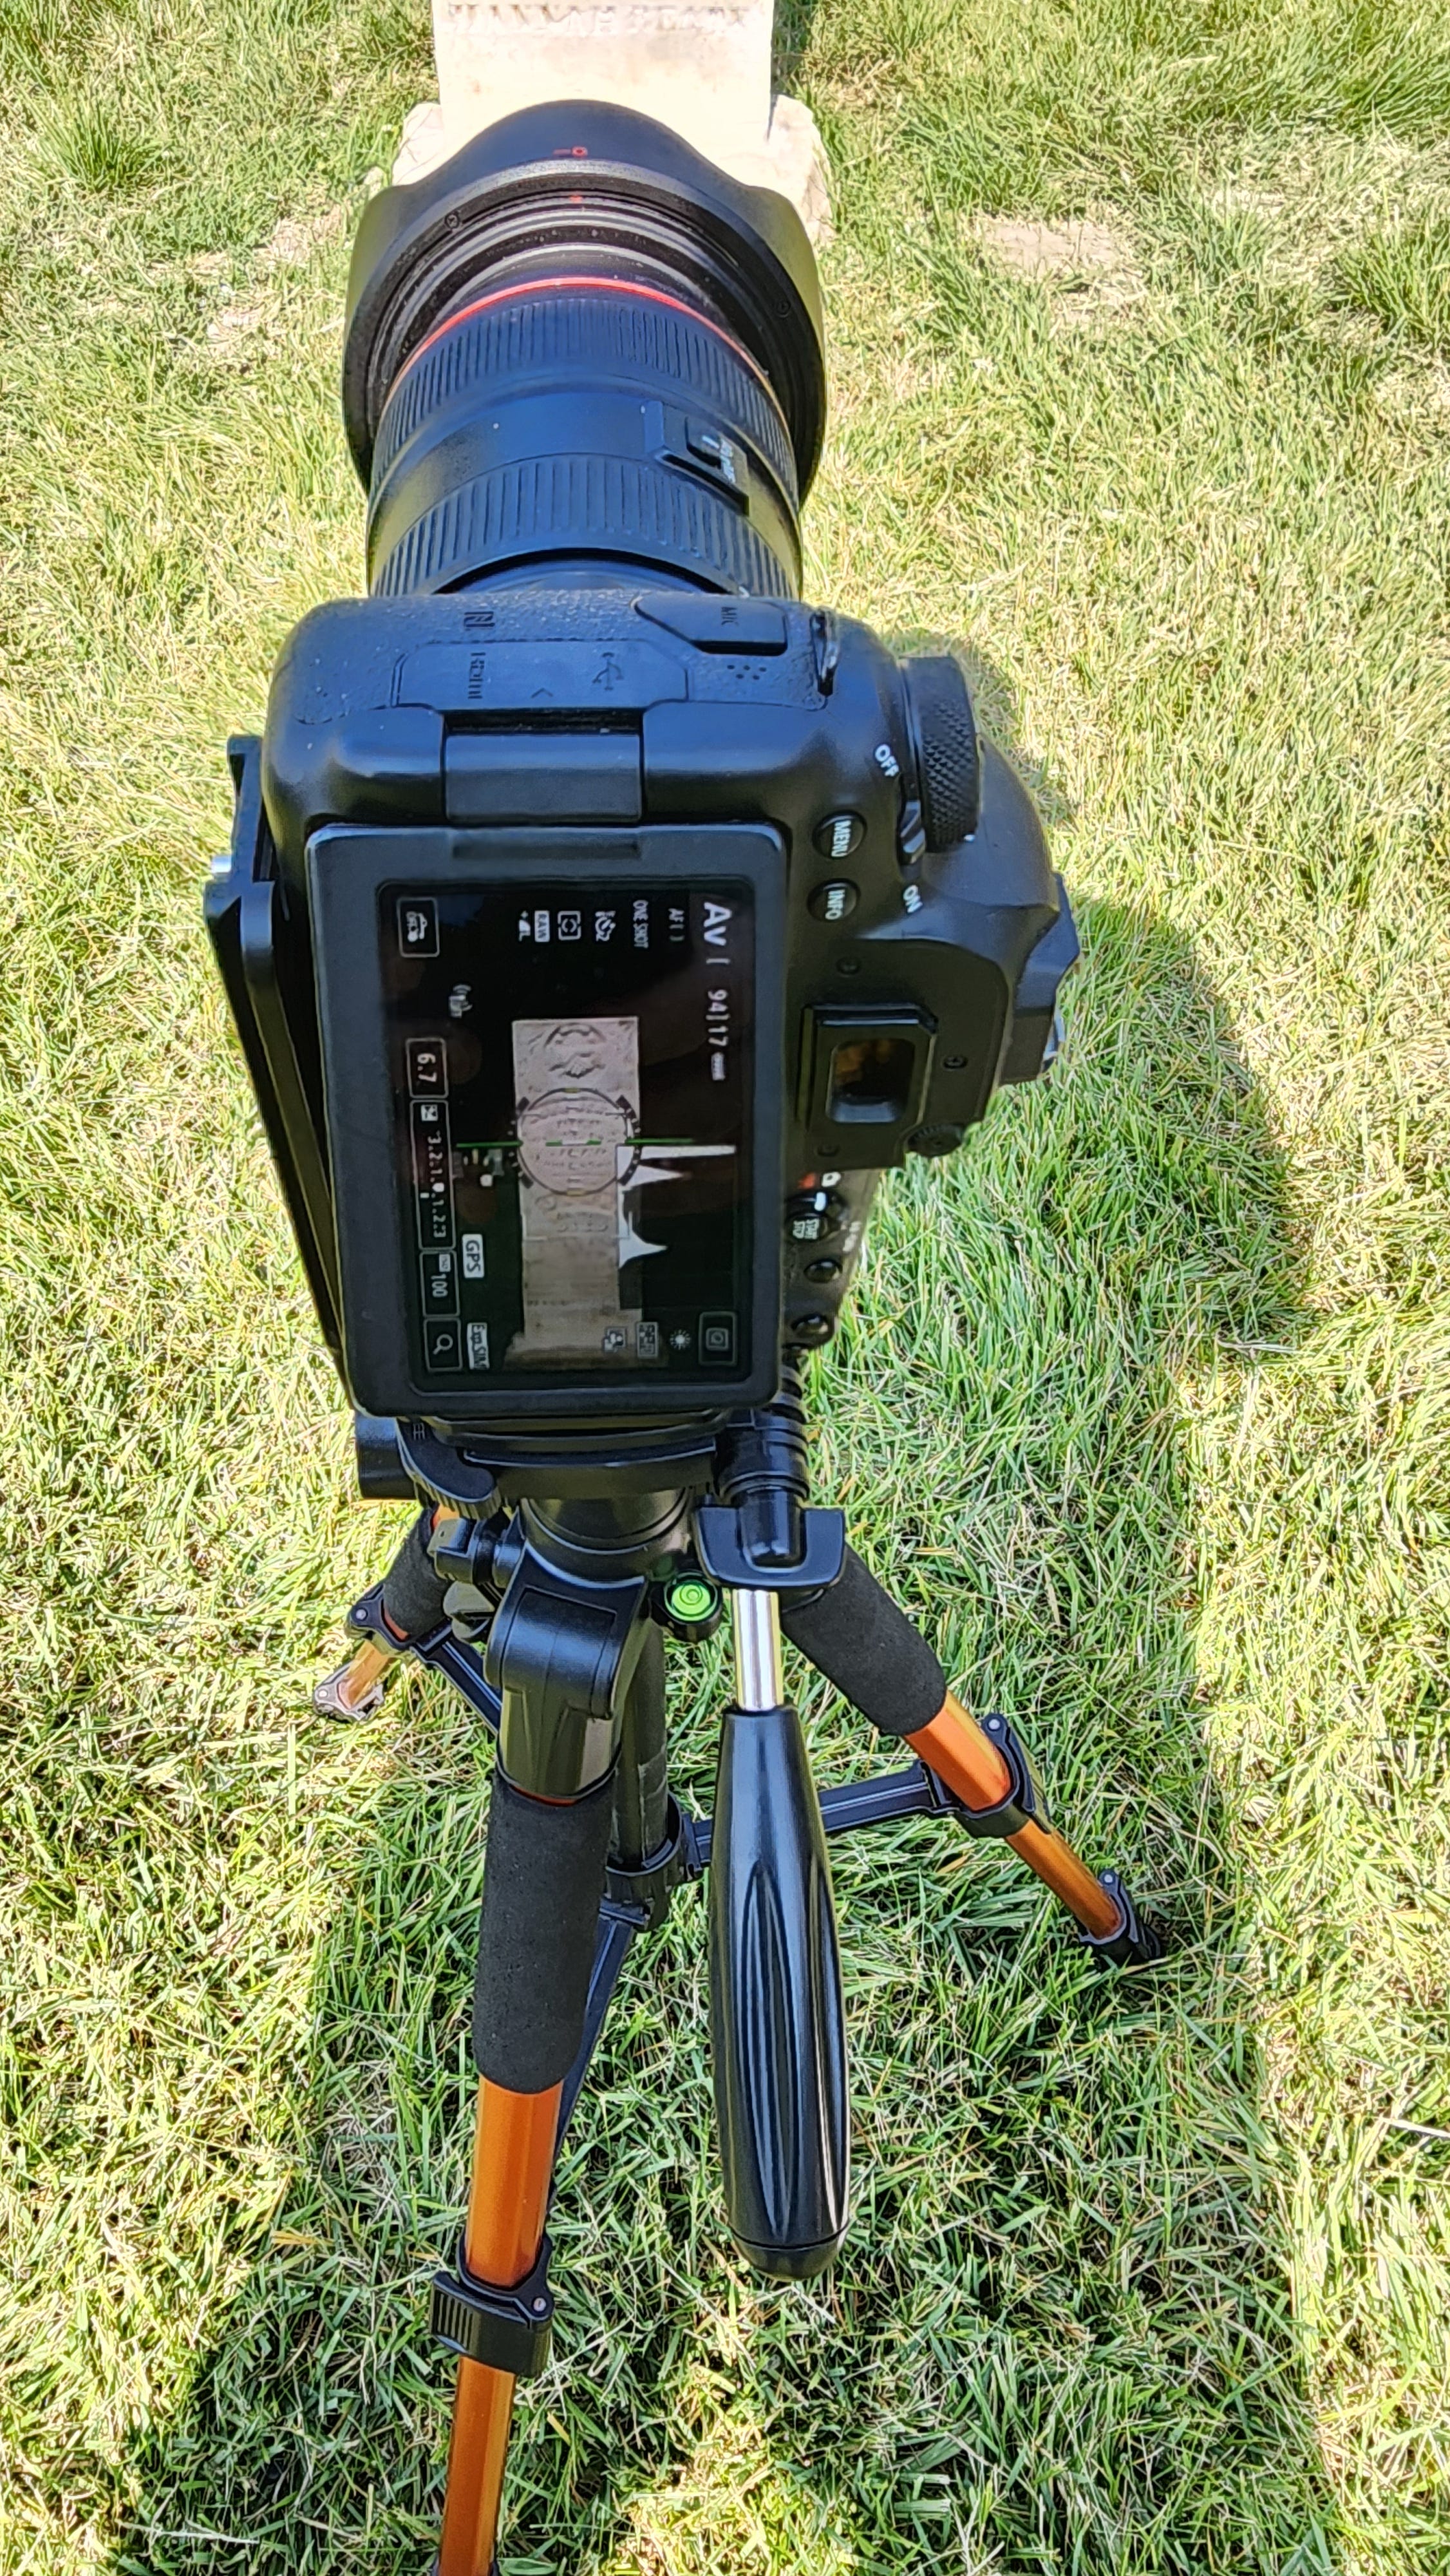
Always use a tripod. I carry a big and a little. Non-negotiable. Notice the small green circle (leveling indicator). In the above staged photo, the tripod is set incorrectly. Proper position is one leg toward subject and the other two to your left and right.
Use an L bracket to position camera vertical when necessary. It's a $15 indispensable accessory.
TECHNIQUE
Timed shutter release to avoid camera shake.
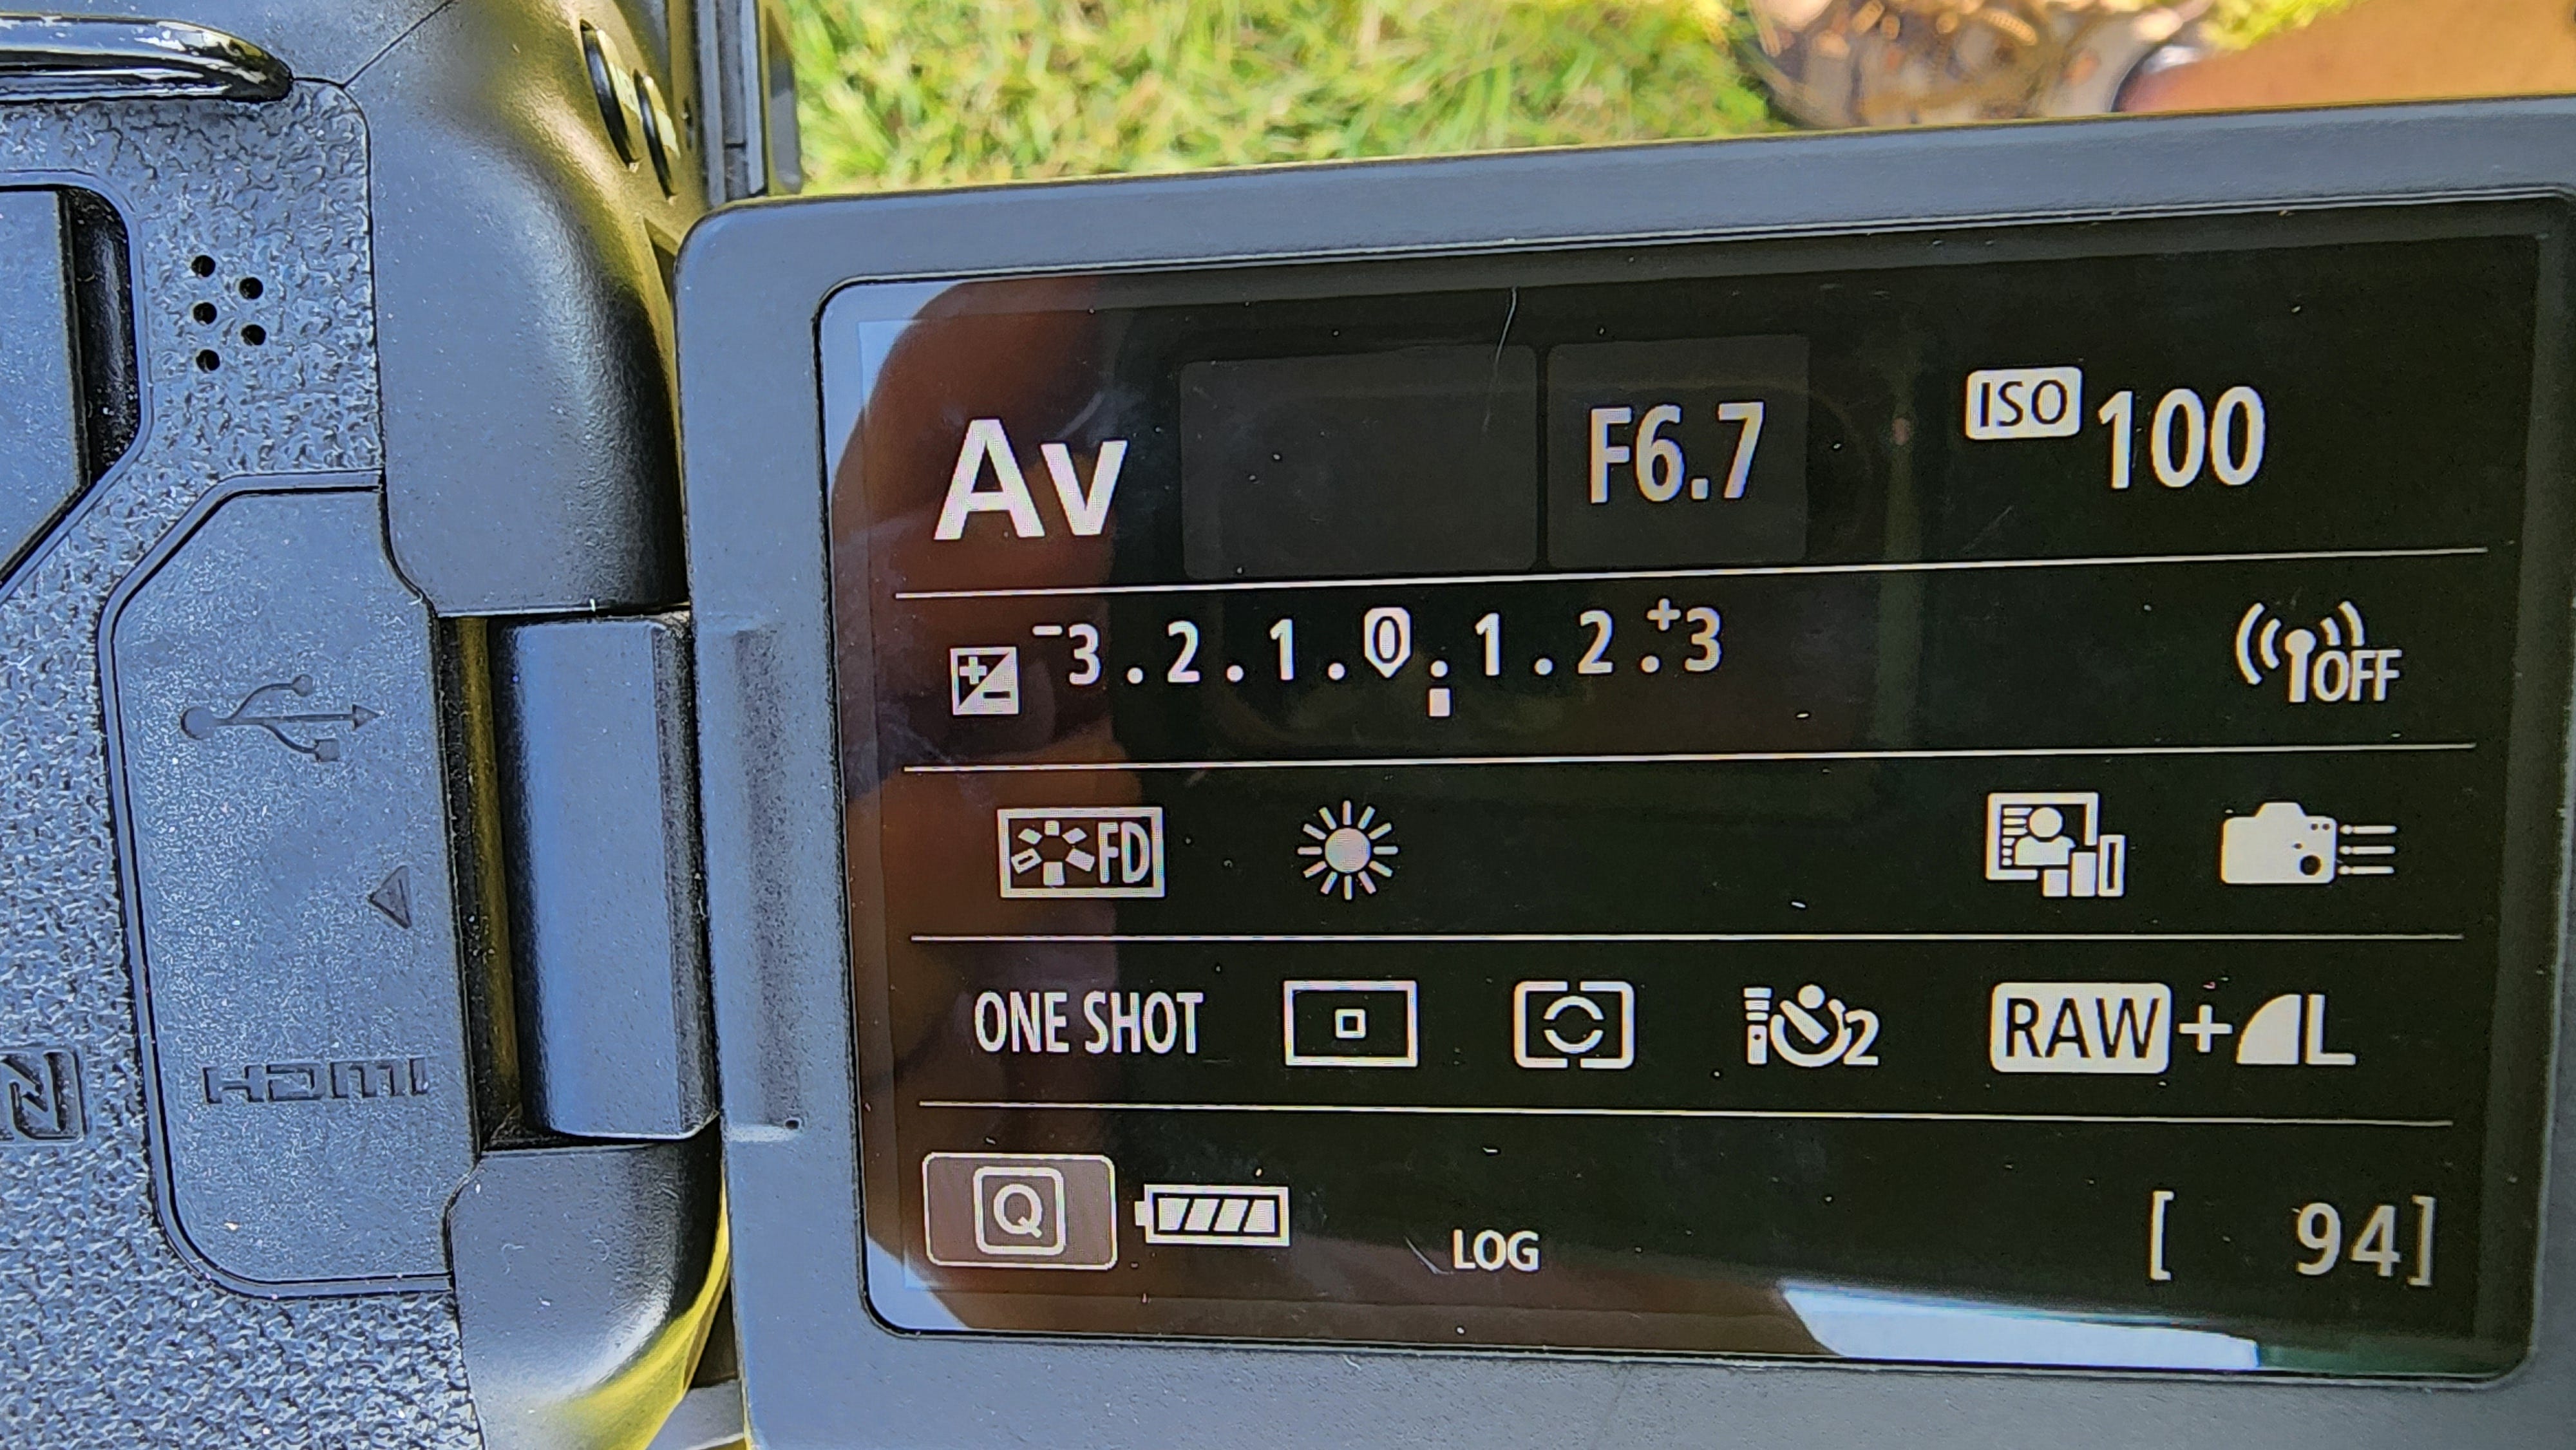
Optimum settings are aperture preference (Av setting on Canon)
100 ISO or maybe 200 if slightly overcast.
Aperture priority with f stop 5.6 to 6.7 unless you are going for some artistic effect. I also open up the lens 3/4 stop when shooting white marble. Otherwise the photo will appear underexposed. Likewise if you are shooting very dark stone, it’s good to step down the aperture ( - .5) You never go wrong by bracketing the shot with slightly different exposures.
Control the light with lens hood and reflector if necessary. I use a fold up 35 inch oval reflector, white on one side and silver on the other. $20 cost on Amazon and folds away small enough so I can carry it always. Useful for shaded markers and unusual angles.
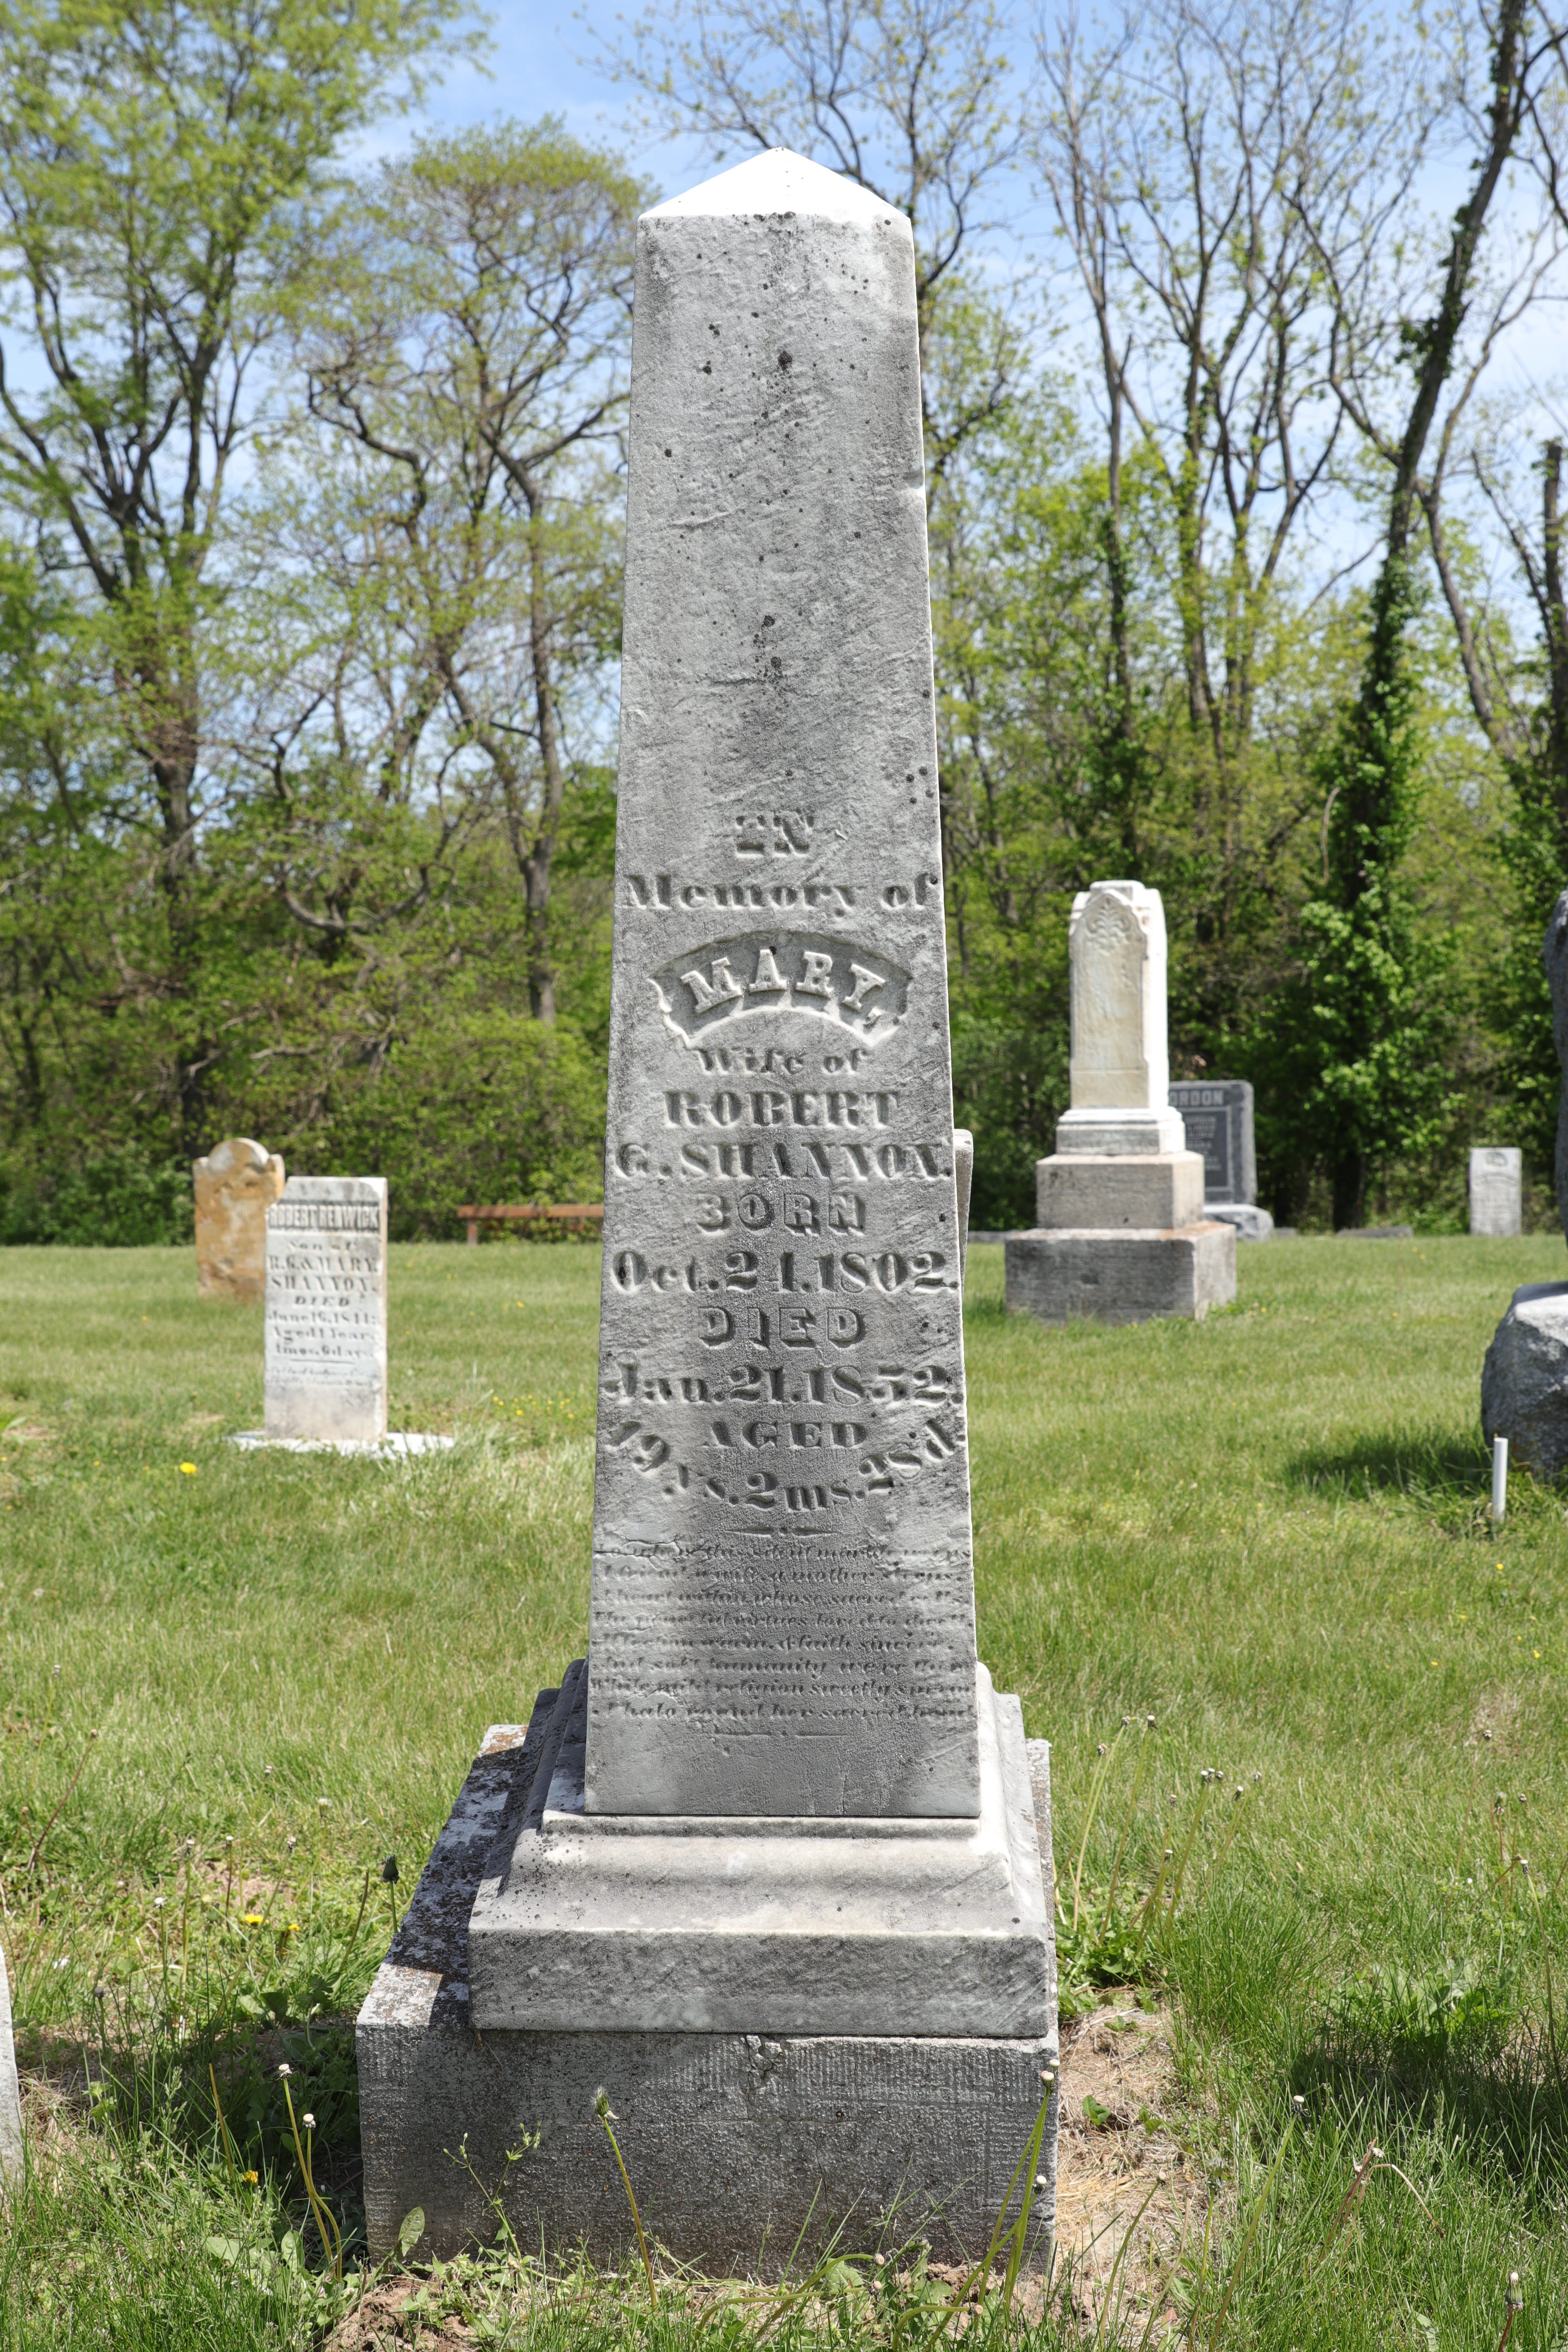
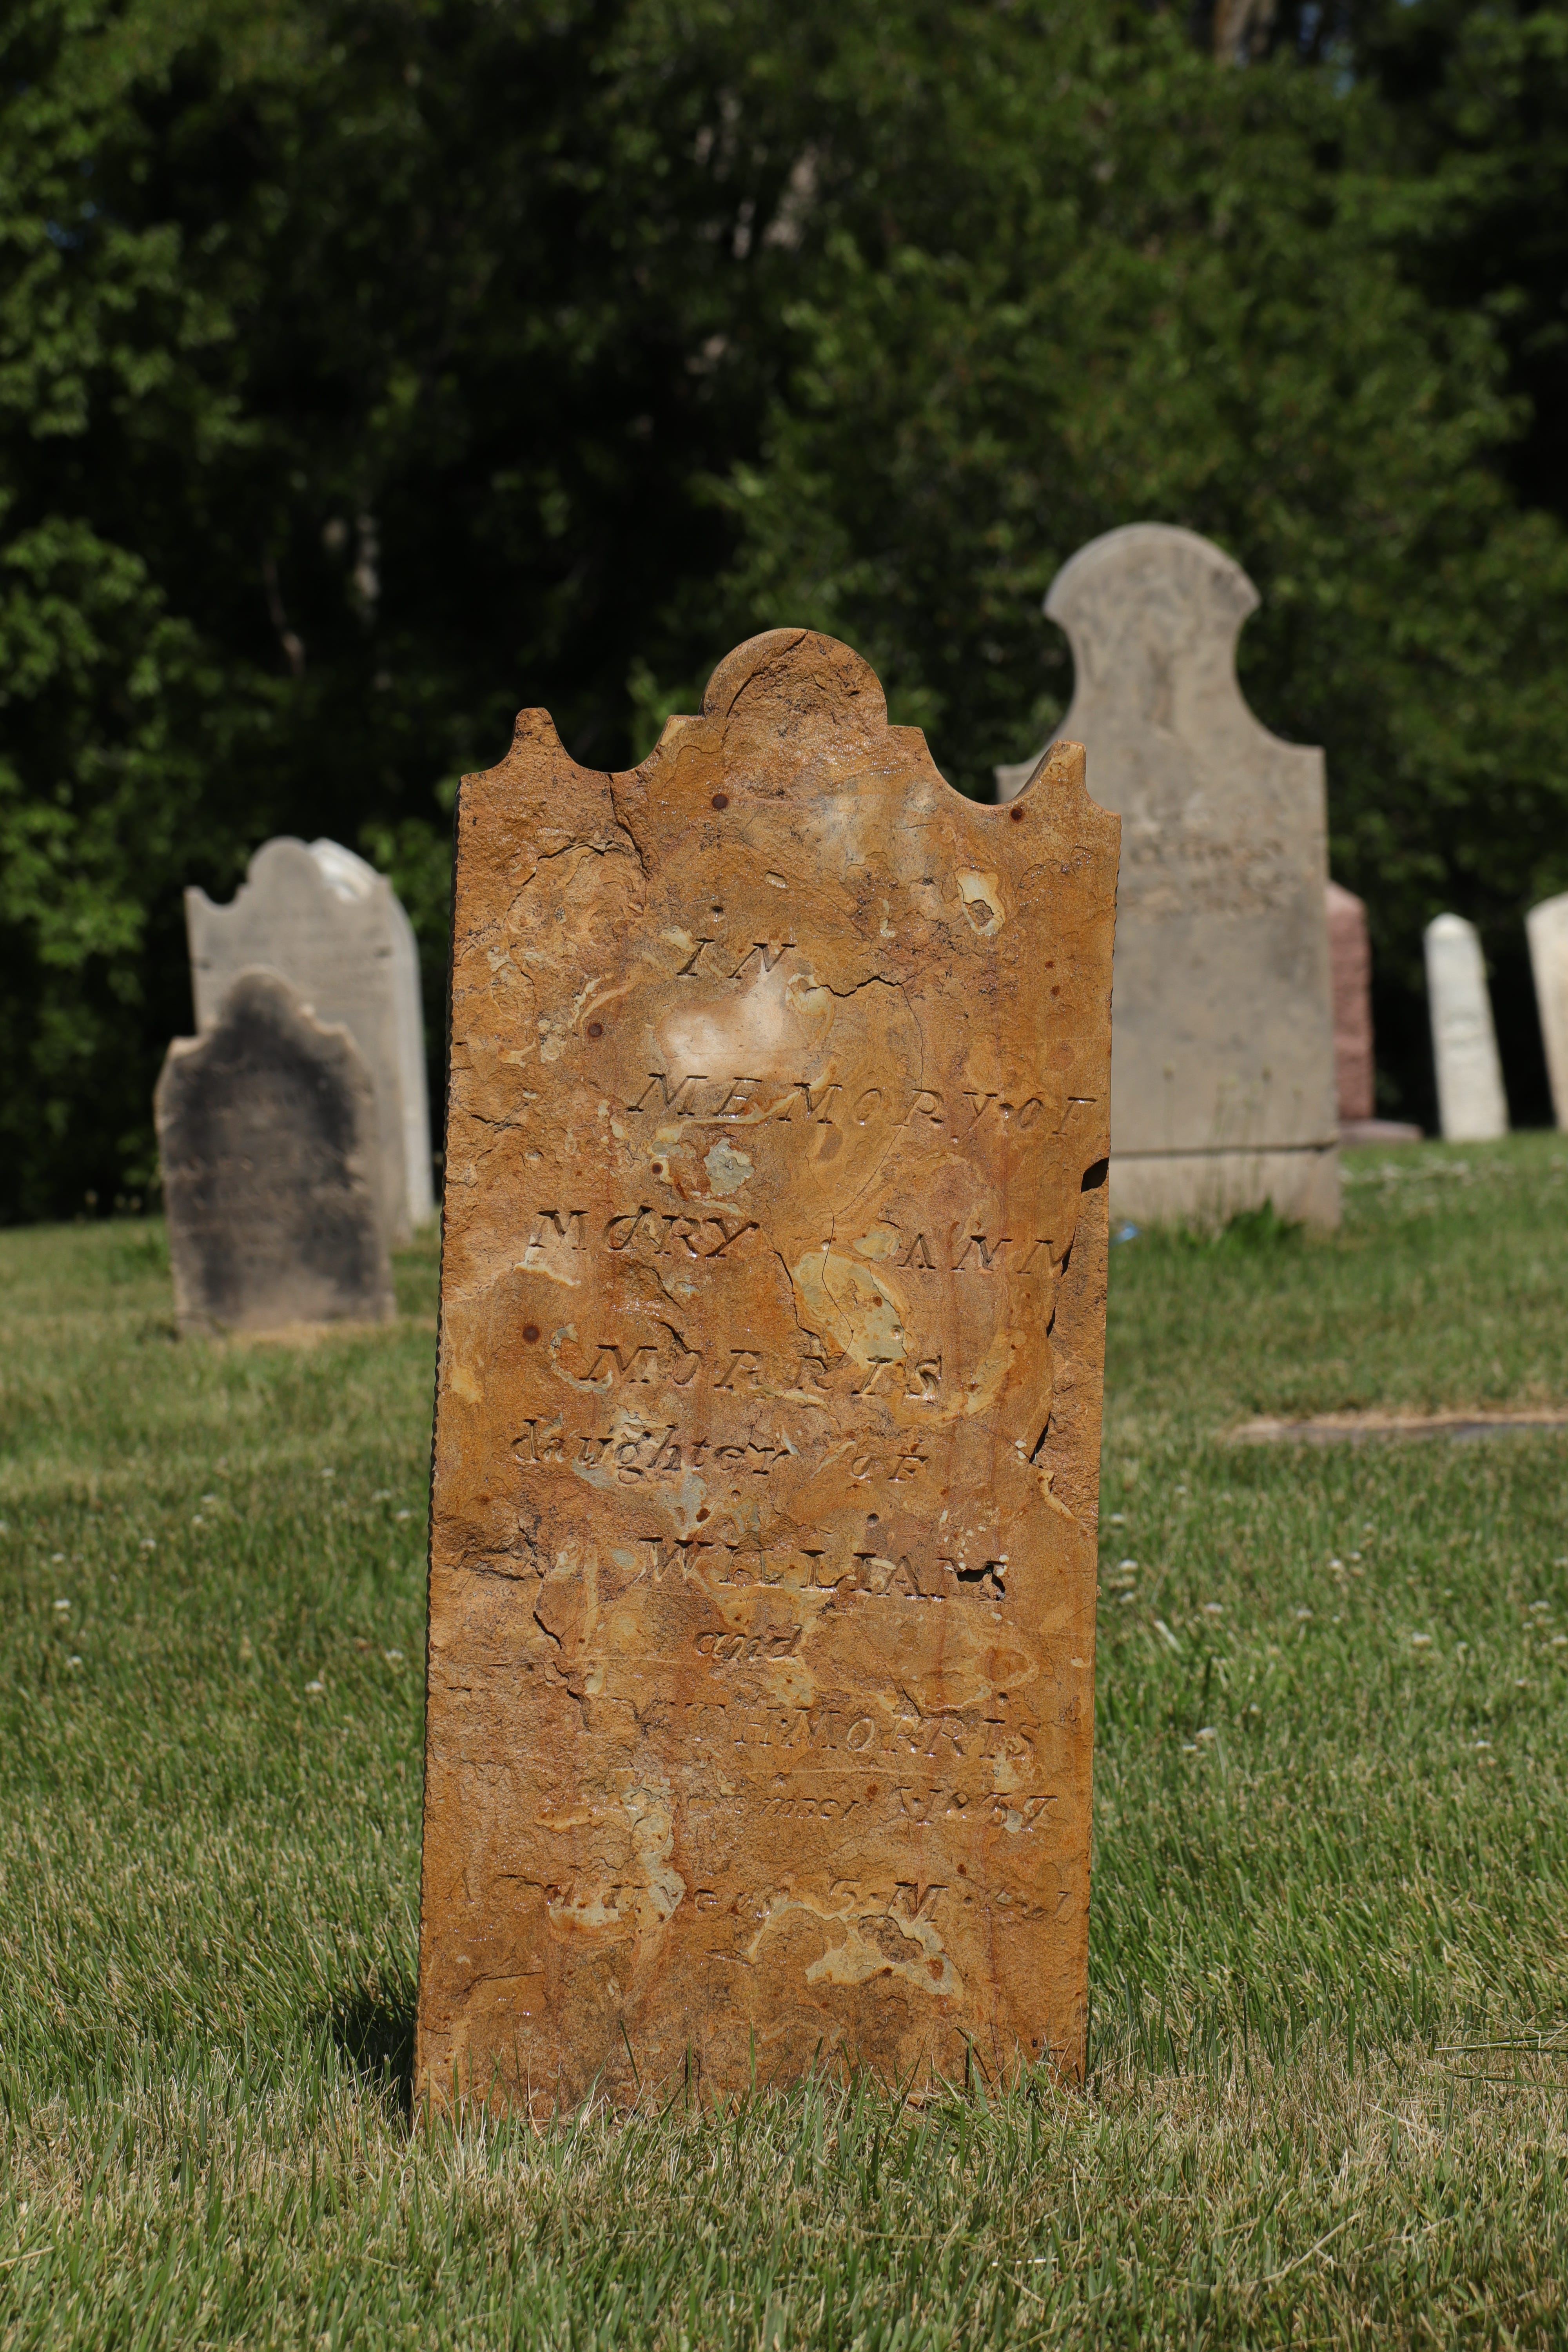
Position the camera exactly square on center of the stone to reduce parallax effect.
What is parallax? Simply that objects farther away seem smaller than objects closer. In cemetery photography it is important to center the camera square on to the stone, the barrel of the camera exactly perpendicular to the subject’s face. Compare the two photos below.
MOST IMPORTANT TAKE AWAY
Always take advantage of the happy time of day. If the markers are facing west, In my zip code right now (Central Daylight Savings Time) that's about 1 pm to 2:15 pm. If east, that's about 11:15 am to 12:30 noon. This is important to get the best oblique sun angle. Your time of day may be slightly different due to time zone, latitude, cemetery orientation, etc.
What ever camera you use, invest the time to shoot numerous test photos to help you make the most of your equipment. I have literally taken hundreds of photos of the same brick exterior of my house to learn how to get the most clear and detailed shots. One by one, I blow them up to inspect the pixels and then do repeated comparisons with different settings, lenses, cameras, etc.
Shoot in both RAW and jpg format. It's easy to edit the RAW version and save to jpg. Even iPhones allow shooting in RAW now.
It's OK to post more than one photo on FindAGrave. One for documentation, one for location identifiers and maybe one for interesting detail or epitaph.
Pay attention to the background. Does it add to the photo or distract? Does the background contain important locational identifiers?
The above ideas are mostly my own but I have borrowed heavily from the wisdom of others. Special thanks to Jane Hopkins for her advice on “L” brackets.
Jane Hopkins Cemetery Reflections <Click the Link
But, all this is too complicated and it takes too long!
Doing great work does take more effort. The solution lies in practice, planning and automation. There are things you can do to make it faster and easier.
Practice: This is self explanatory. There is no substitute for repetition.
Planning: You can mark all of your work in advance with survey flags to reduce wasted time wandering around looking for that one marker you needed a photo of. Likewise, adjust camera settings in advance, check batteries, etc.
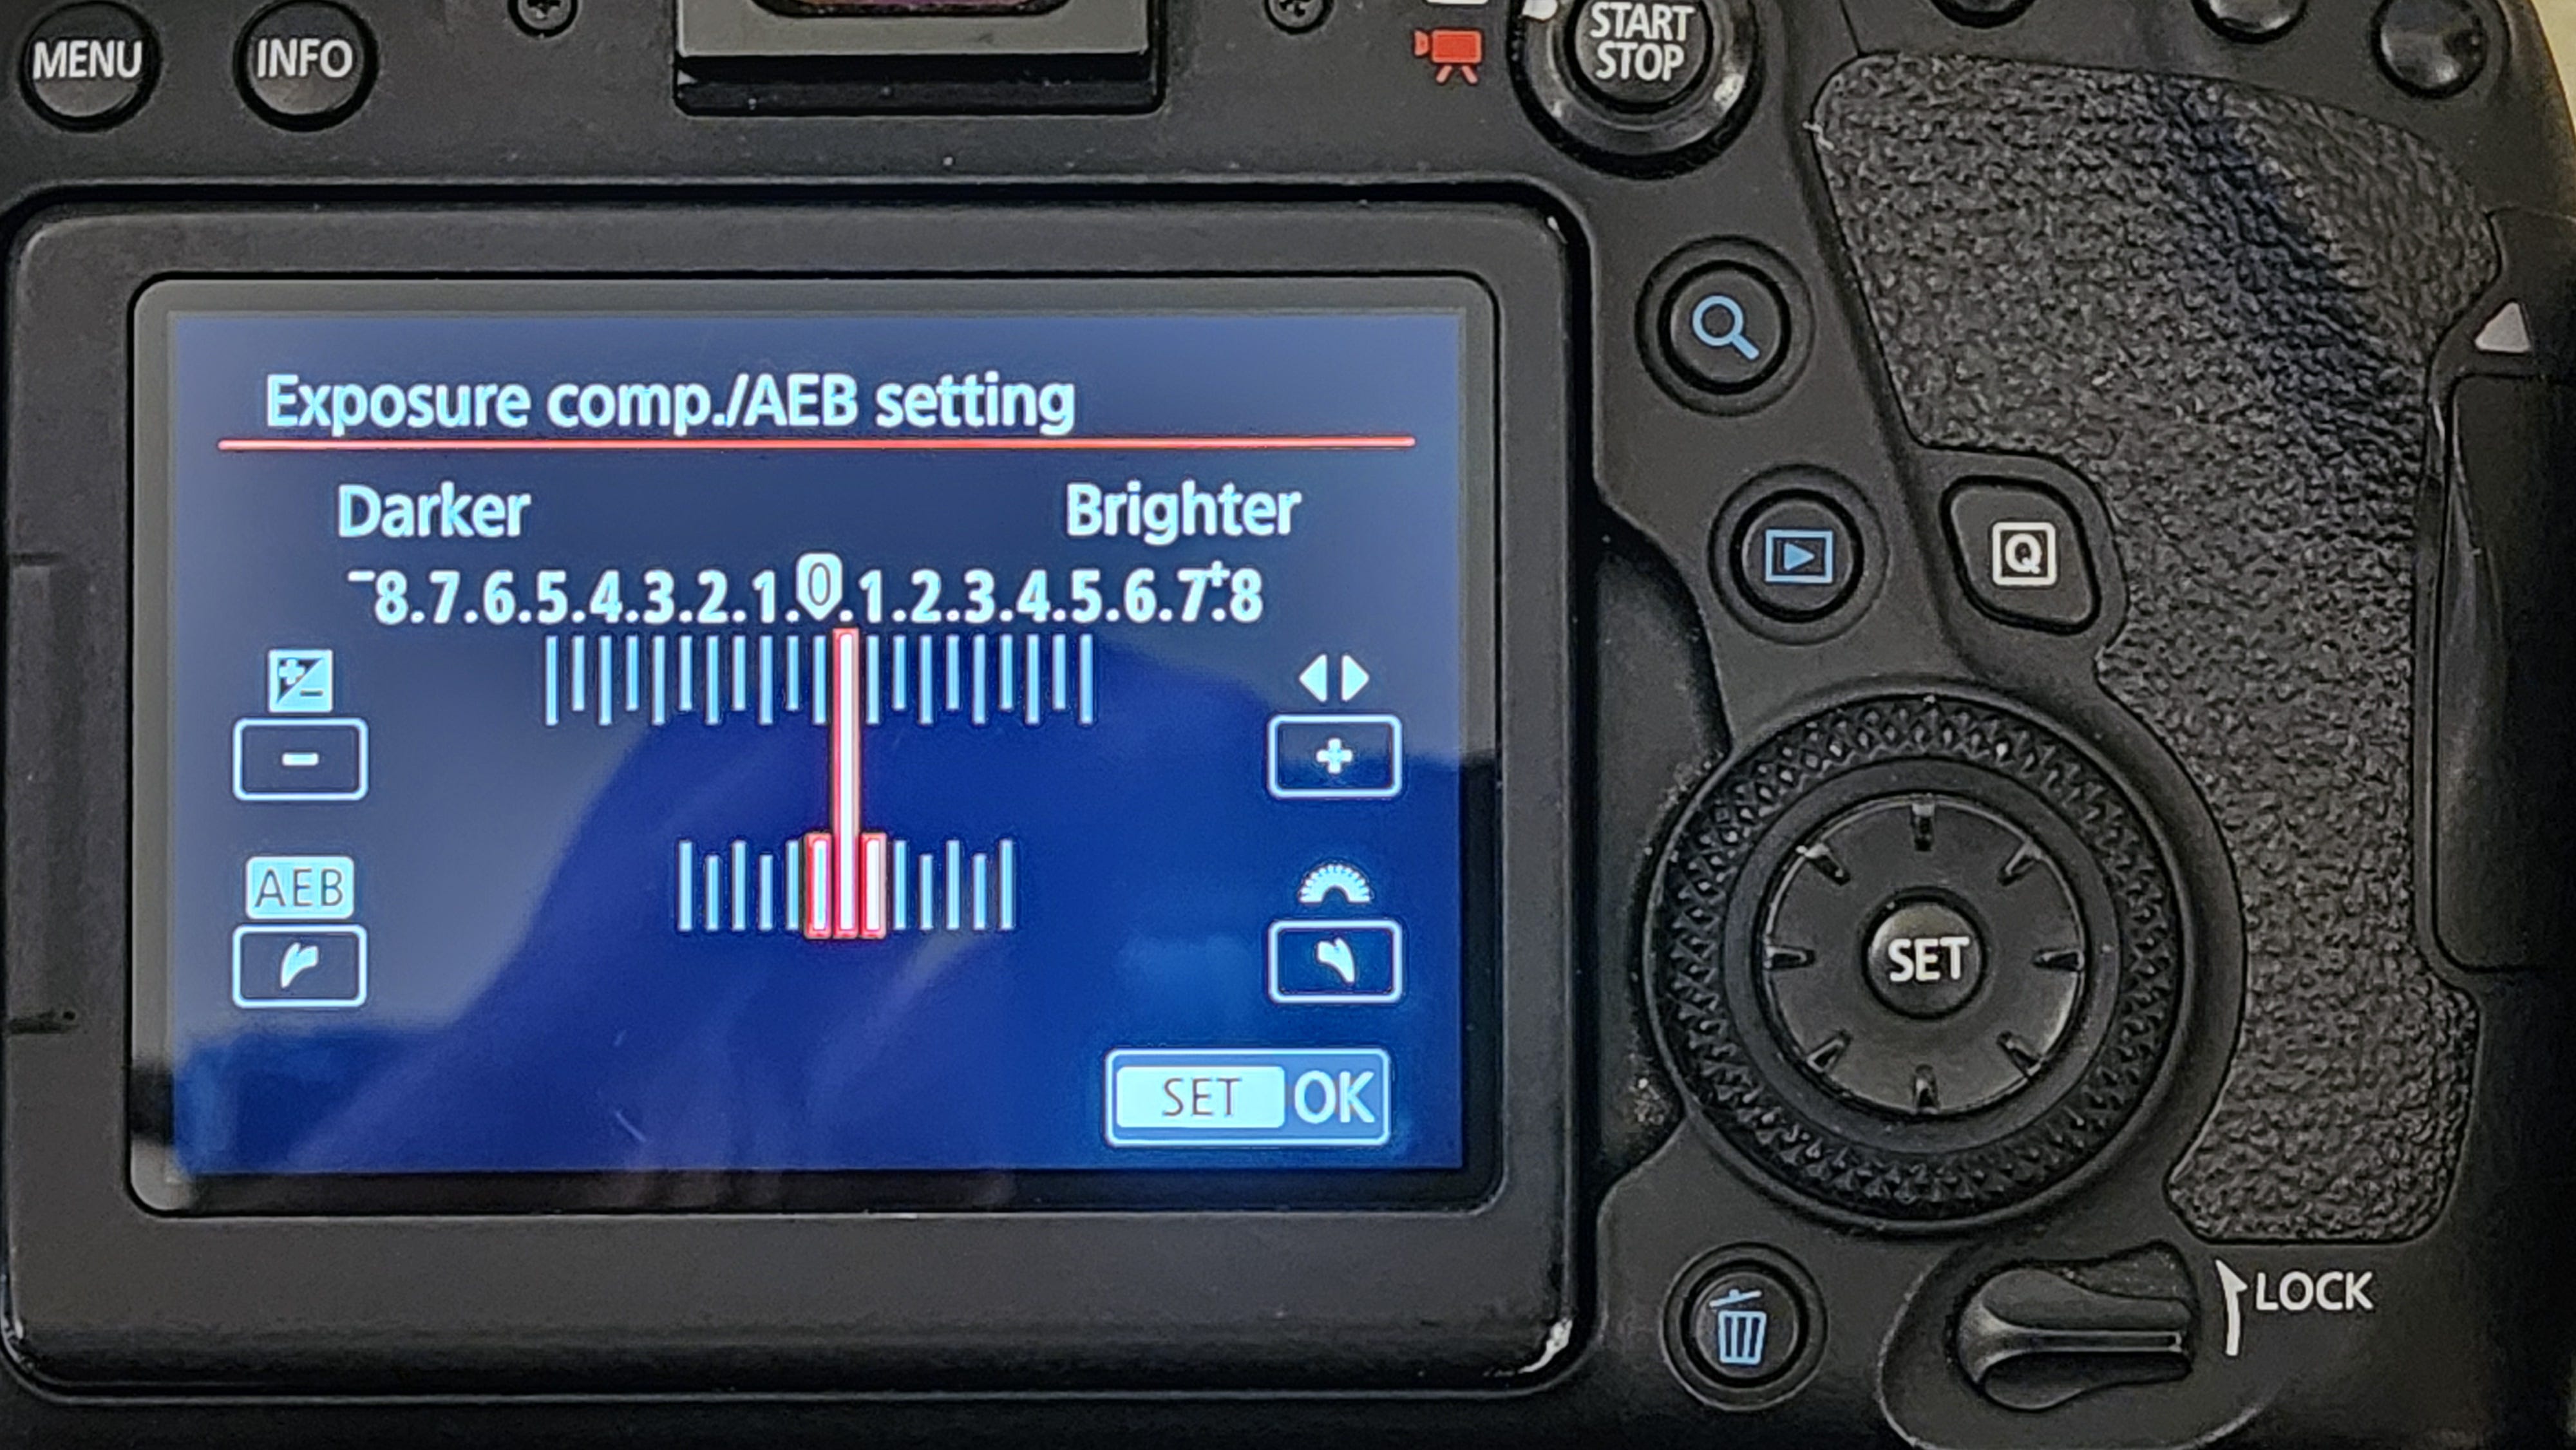
Automation: An assistant helps greatly in prepping shots, holding reflector, guiding to the next shot, taking notes, etc. Your camera settings can help you also. Using the Bracketing feature on your Exposure Compensation setting saves time. One click on the shutter gives you instantly three photos at varying exposures. This only saves one minute but for twenty markers, that’s 20 minutes saved when you only have maybe 90 minutes of prime time light. This feature is also on iPhones as well as most cameras.
But why all this trouble?
The problem with FindAGrave.com is the diverse range of users. Genealogists, Family memorialization, and “collector enthusiasts” all have their place and function but do not always acknowledge the needs of others very well. Serious historians and students of gravestone research, though perhaps less numerous, contribute significantly to the detailed documentation of grave markers yet often have the most difficulty getting edits approved, bios updated and proper photo documentation. I was actually told by a heavy F.G. user that the information entered into the Inscription entry field should not include the full inscription. What?
High-quality photography benefits all users but is especially vital for the in-depth study of these historical artifacts.
For me personally, I admire the beauty and wish to capture it. But the practical reason is that stone is not forever. Mountains wear down with time and so will these marble and sandstone grave markers. Capturing this moment in time will preserve the image and information contained, if not the actual stone.
If you have thoughts, comments or criticism on this, please post or direct message. I am always open to learning from others.
Since beginning the writing of this article, I now use a Canon EOS 6D Mark II. The upgrade is a full frame DSLR with the same features as previous camera but more pixels and an improved CMOS sensor. That means a little bit sharper and noticeably better color rendition. Used price on Ebay.com about $700.
Using a lens designed for a full frame camera on a cropped frame (smaller sensor) camera will effectively change the lens to a longer one by the factor of 1.6. So, a 24-70 zoom becomes a 38-112 zoom. Gravestone photography is almost always in the 35 to 55 range.
As someone who has taken a lot of awful gravestone photos (most with my phone), I can't thank @David Shaw enough for these pro tips! I can't wait to get out and take some better photos. Thanks!
Excellent article. Though it did make me laugh; when my father-in-law died we found hundreds of photos of brick walls. He loved cameras and how they worked but was less keen on actually taking photos.